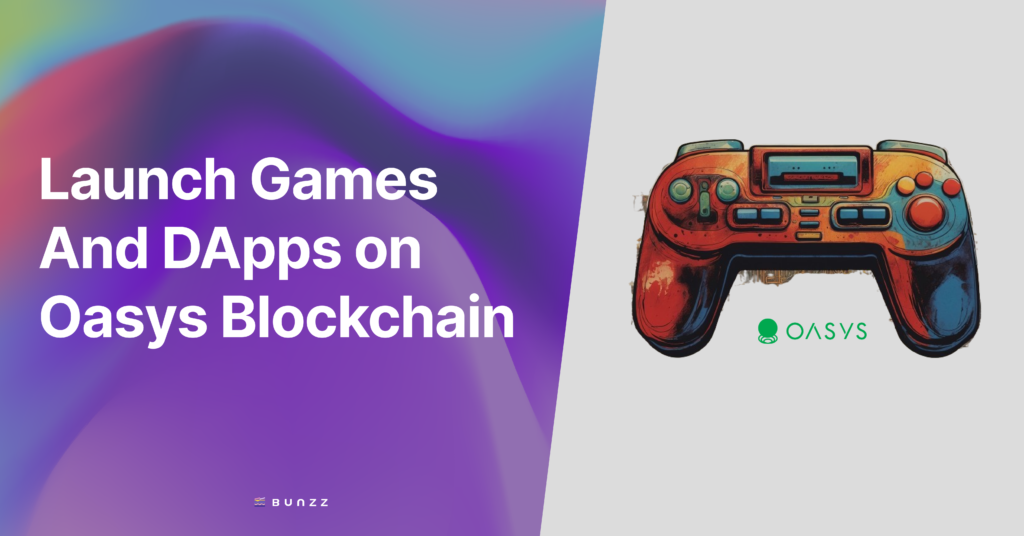
Oasys Spring is a tool for beginners and developers to deploy their first of many DApps and games in a couple of clicks directly from GitHub Repositories via AI scanning on Oasys. Developed in collaboration with Bunzz, Asia’s largest smart contract development platform, Oasys Spring simplifies the smart contract deployment process on Verses. This GUI-based tool will help you build and deploy on the Oasys blockchain without writing a single line of code.
This tutorial will guide you through the steps to log in, select a GitHub repository, configure your project, and deploy your application on the SAND Verse on Oasys chain using the Oasys Spring tool.
* As of July 2024, Oasys Spring has been released in its beta version.
Getting Started
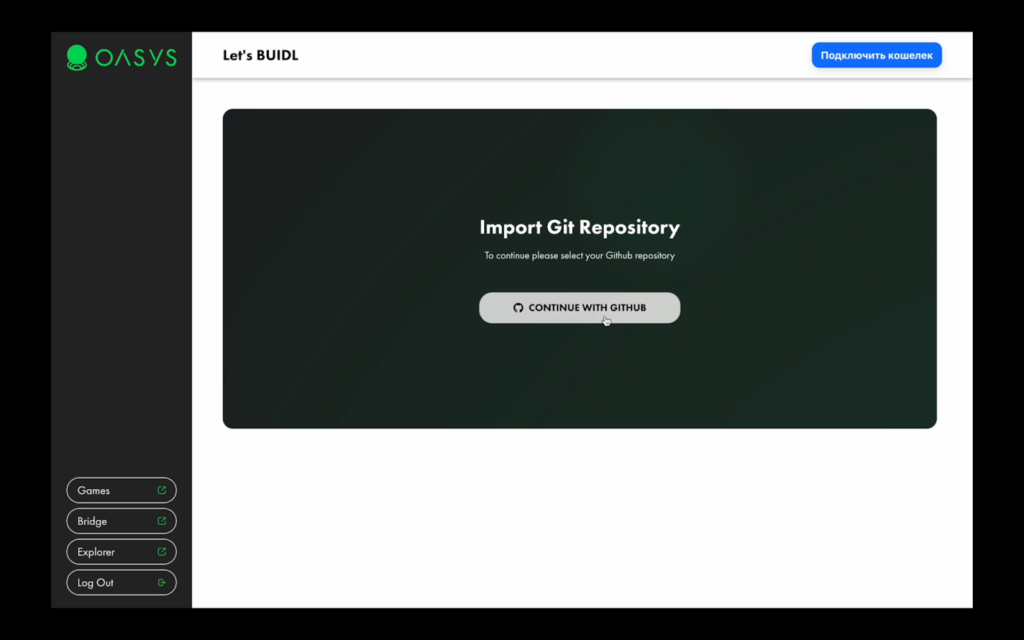
Open the Oasys Spring application by clicking here. On the login page select the CONTINUE WITH GITHUB button. You will be redirected to GitHub. if you don’t have an account, please create one first GitHub: Let’s build from here
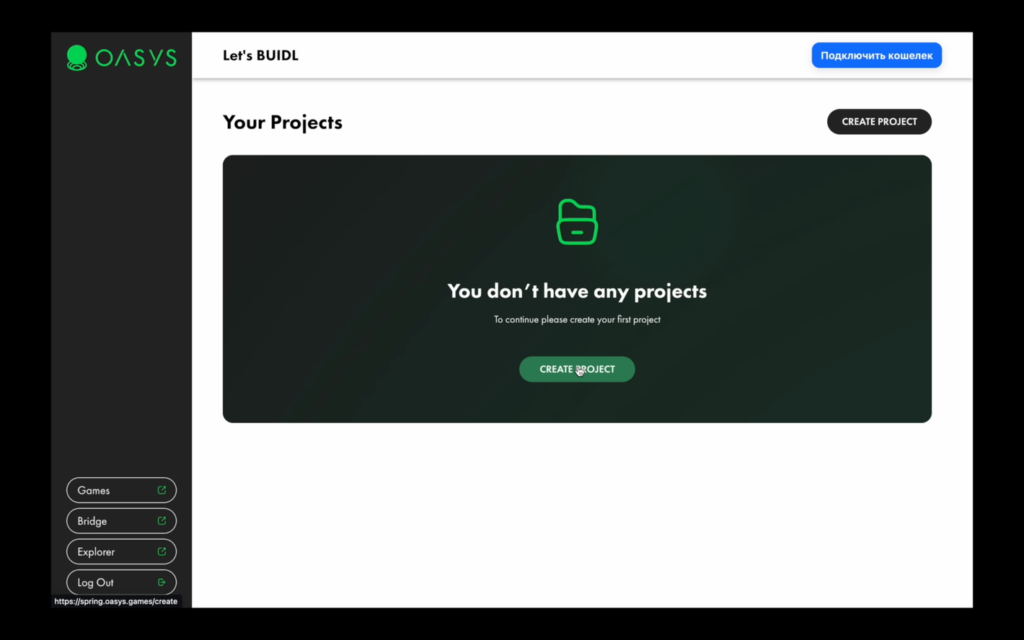
After logging in, you will be prompted to create your first project. Please click on the Create Project button.
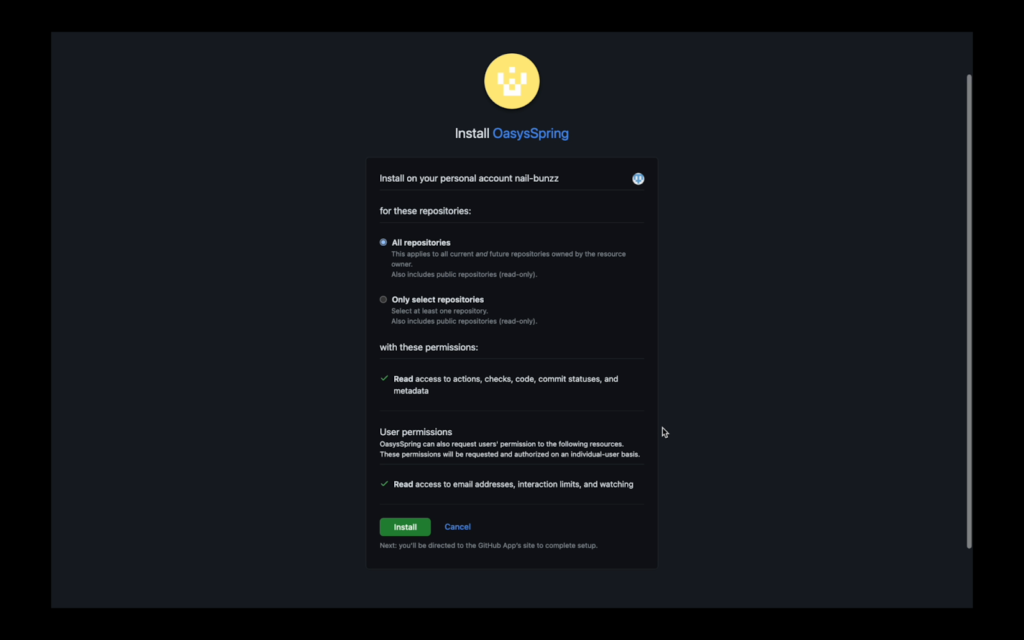
Click on CONTINUE WITH GITHUB button to install the OasysSpring application on your GitHub repositories. As an example, you can fork the repository used in the video.
https://github.com/nail-bunzz/testing-erc20
Choose the appropriate repositories (either all or specific ones) that you want Oasys Spring to access.
🚨 If you are using an organization’s repository, ensure you have an admin-approved installation request.
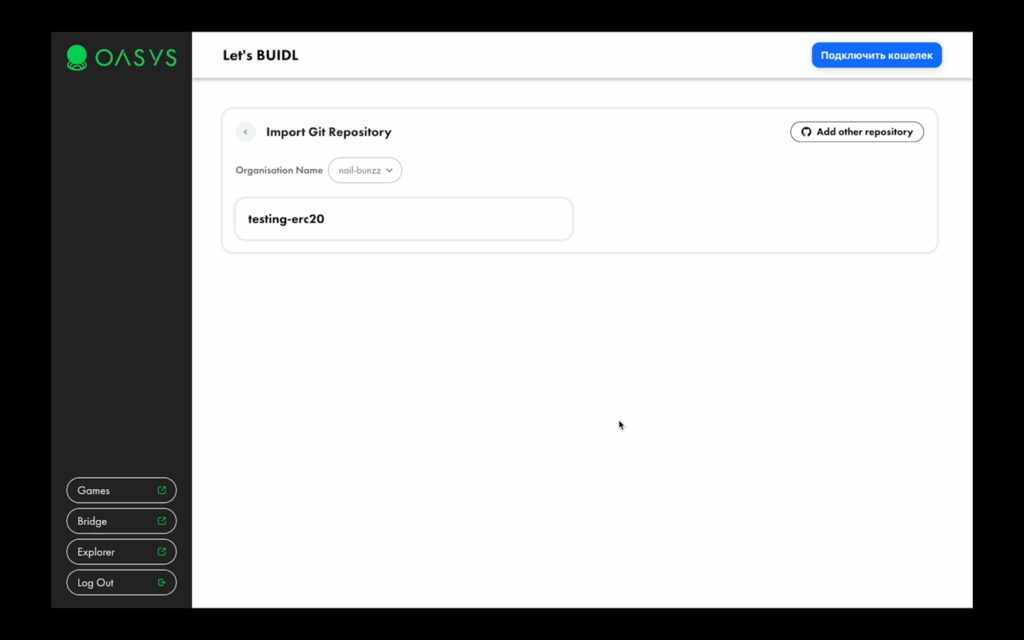
After installation, you will be redirected back to the Oasys Spring application where you can now see your repository. Click on the card to start creating a of project.
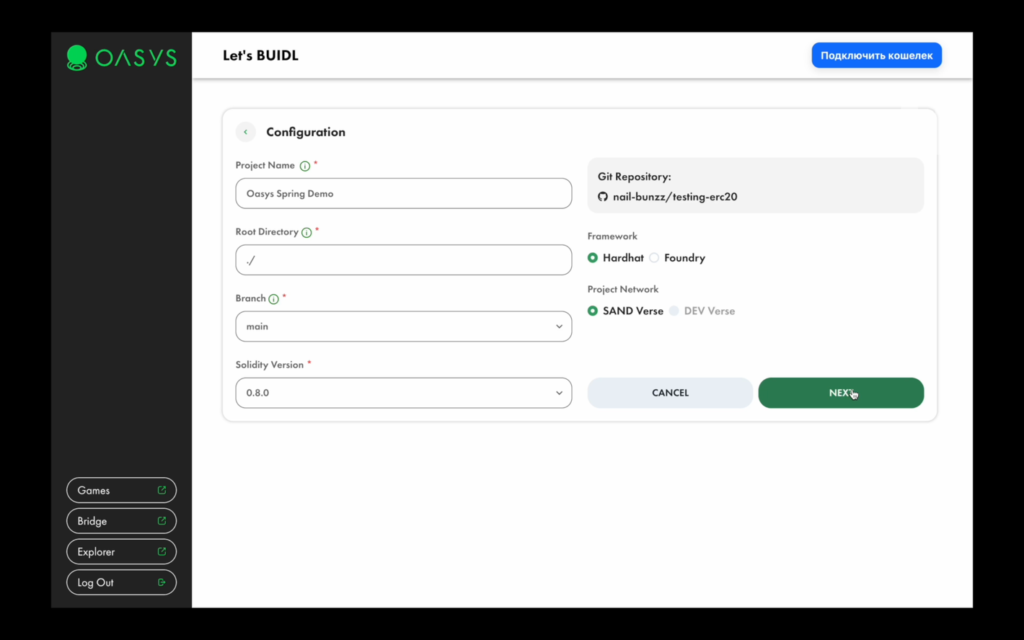
Enter the project details:
Project Name: Name of your project.
- Root Directory: Path where Solidity files are located.
- Branch: Select the branch to use.
- Solidity Version: Specify the version of Solidity as in the configuration of the project.
- Choose the framework (Hardhat or Foundry) and the project network (SAND Verse or DEV Verse).
Click on “NEXT” to proceed. You will be prompted to connect a wallet.
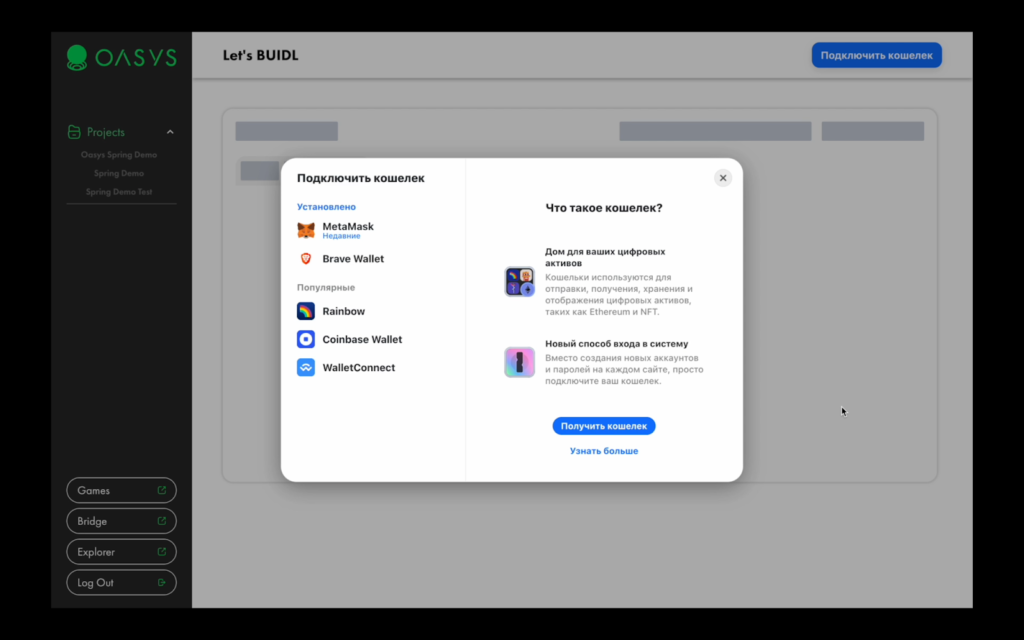
Options include MetaMask, Brave Wallet, Rainbow, Coinbase Wallet, and WalletConnect.
Select and connect your preferred wallet.
Here is the link on how to install MetaMask Wallet.
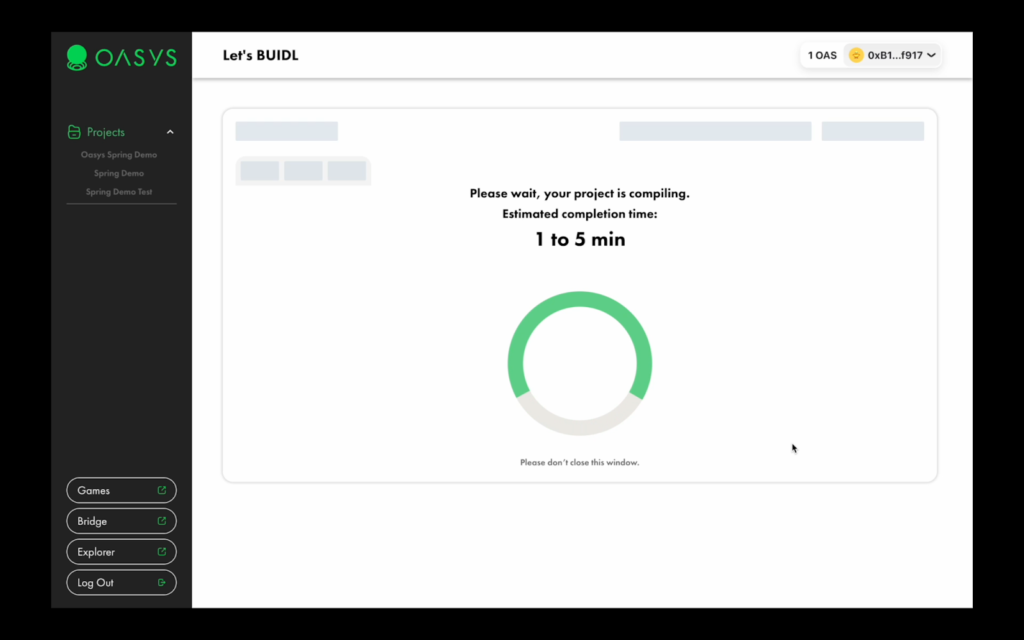
The project compilation process will begin, which may take 1 to 5 minutes. Wait for the compilation to complete.
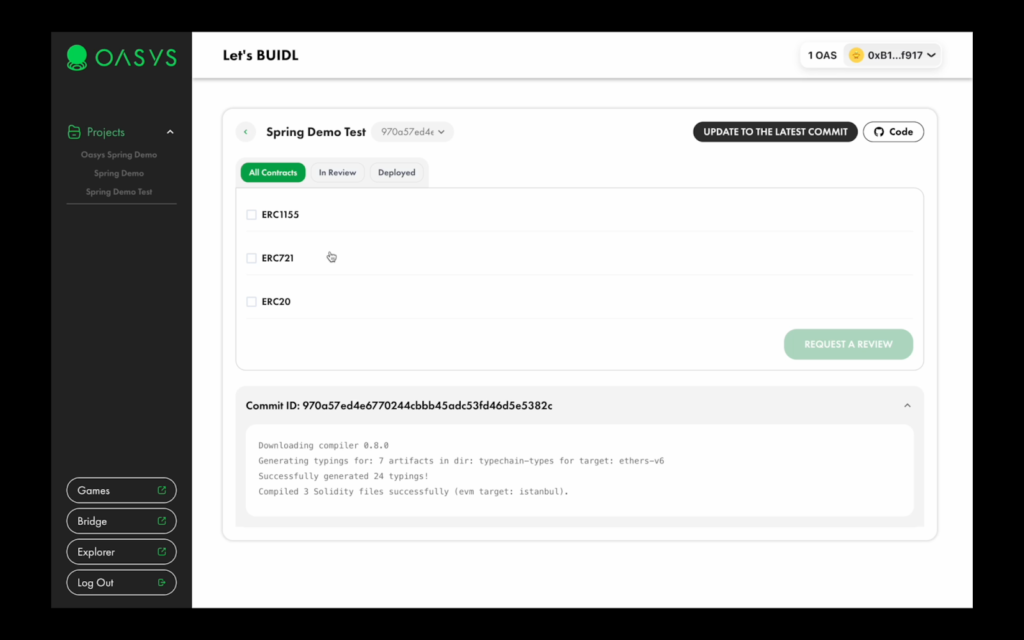
Once the compile process is complete, you will see them in the dashboard.
Before deploying contracts, the auto-reviewing system must inspect them.
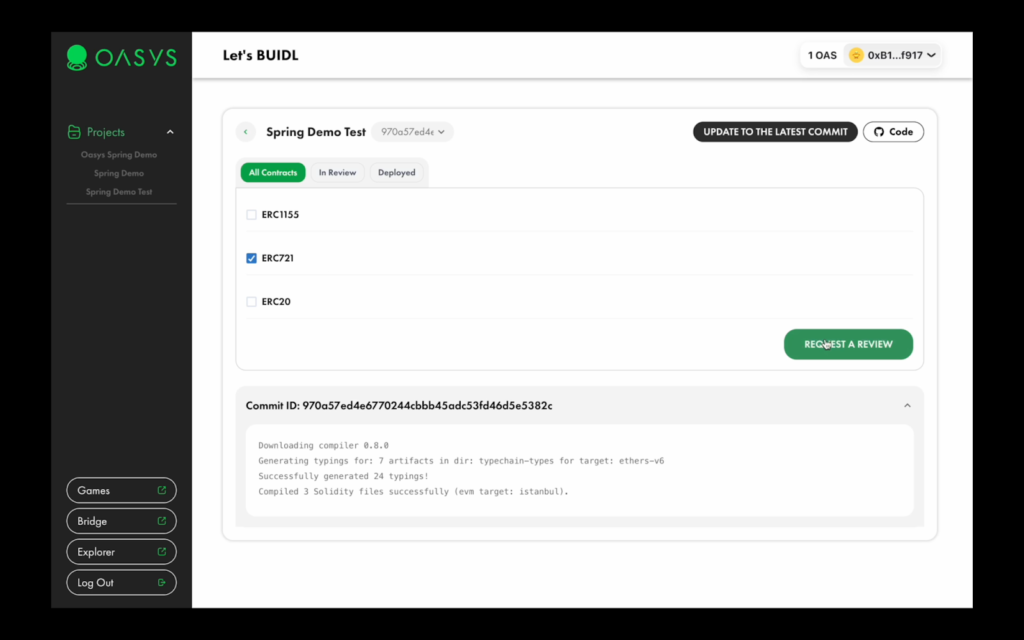
Select the root contracts, which you want to review
Click on the REQUEST REVIEW button to proceed.
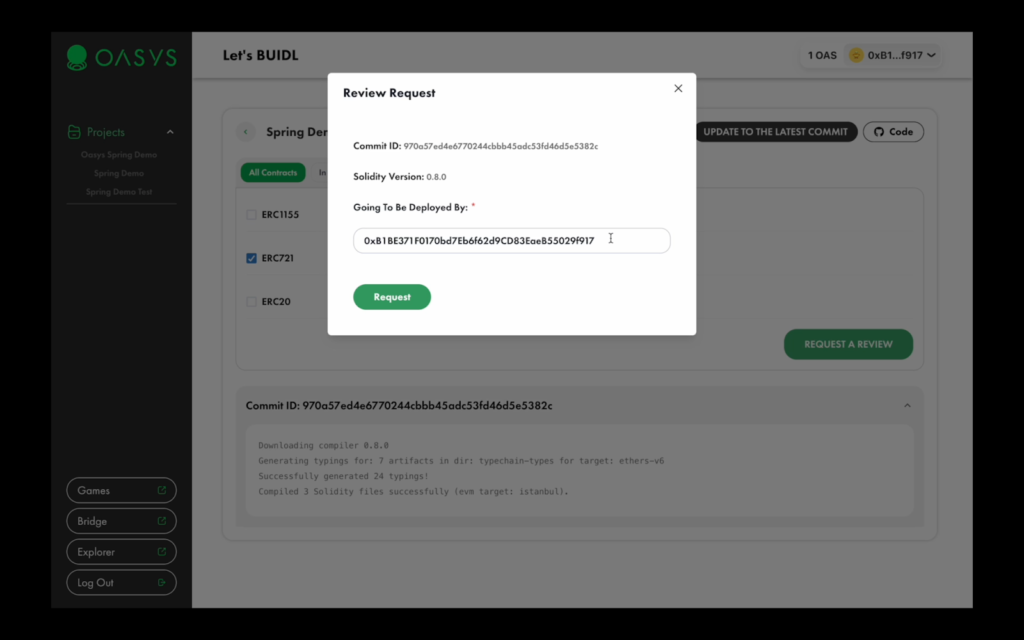
Confirm your settings and click on the request button to proceed with the review.
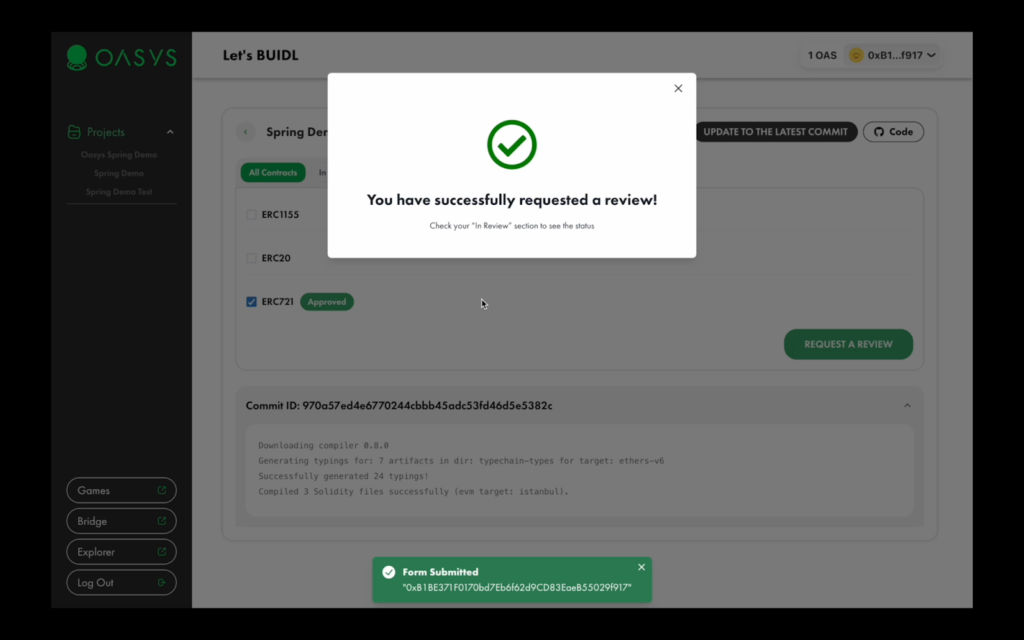
If successful, you will see the option to submit for review.

Upon successful review, your contracts will have the “approved” tag, which means you can proceed with deploying your application on the Oasys Dev chain.
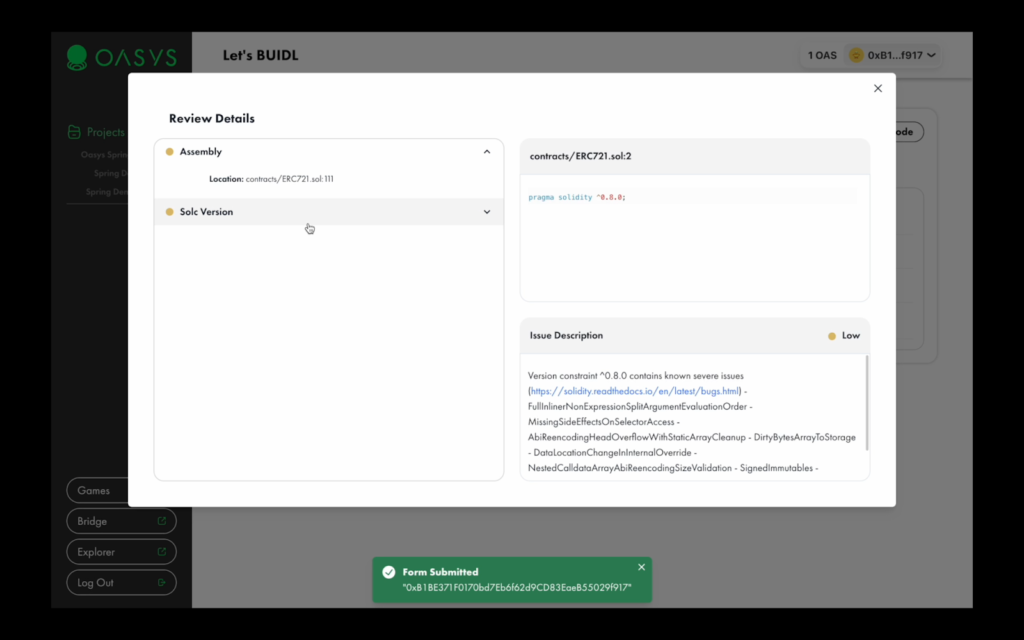
Review contracts for potential issues.

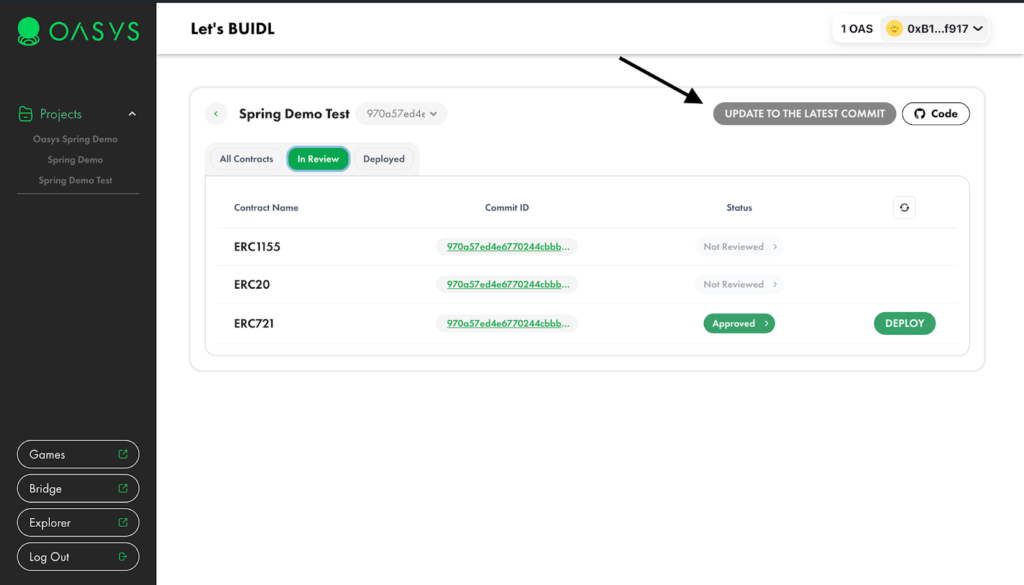
This functionality allows developers to make updates based on results from the review.
If you want to change contracts or make updates to the code, you can:
- Commit changes to the repository, where your code is based.
❗️Make sure you didn’t change the configuration file, as it’s been fixed for a project.
Click on the UPDATE TO LATEST COMMIT button, after you push the changes
- You are going to be redirected to the project compiling page.
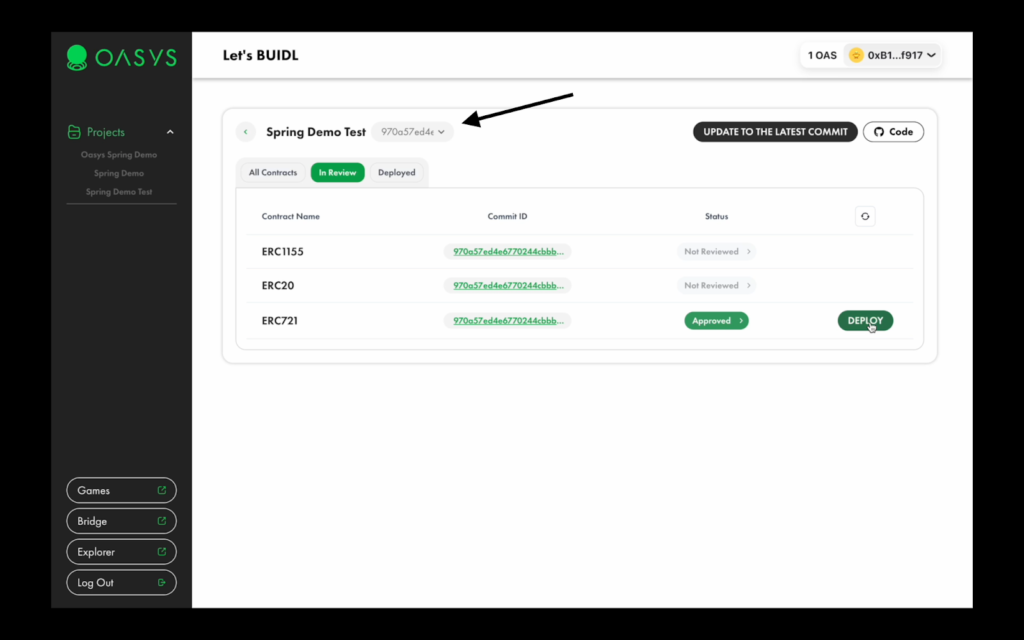
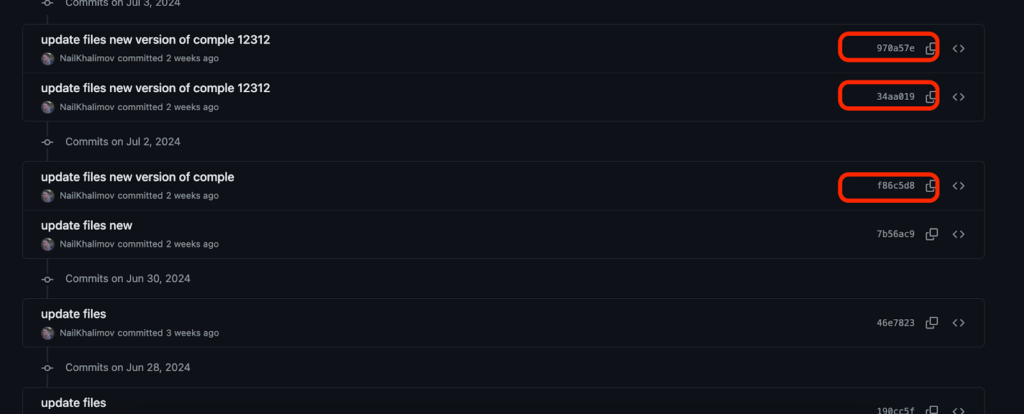
You can choose a version of your application by clicking on the select list. Every id is unique and refers to a git commit id hash.
Here is an example of commit hashes:
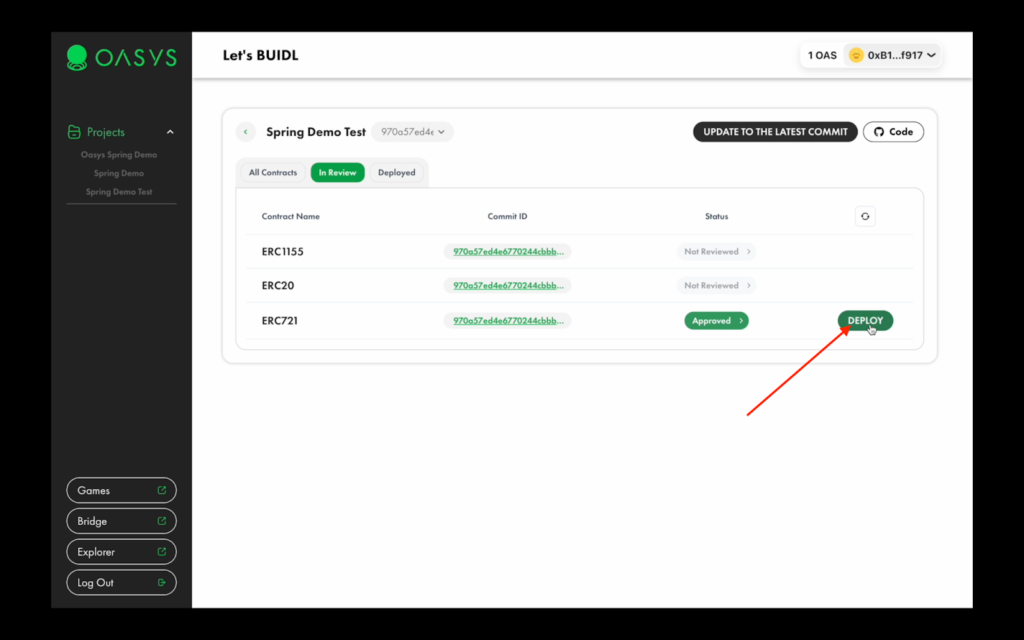
Click on the DEPLOY button to open the page with deployment.
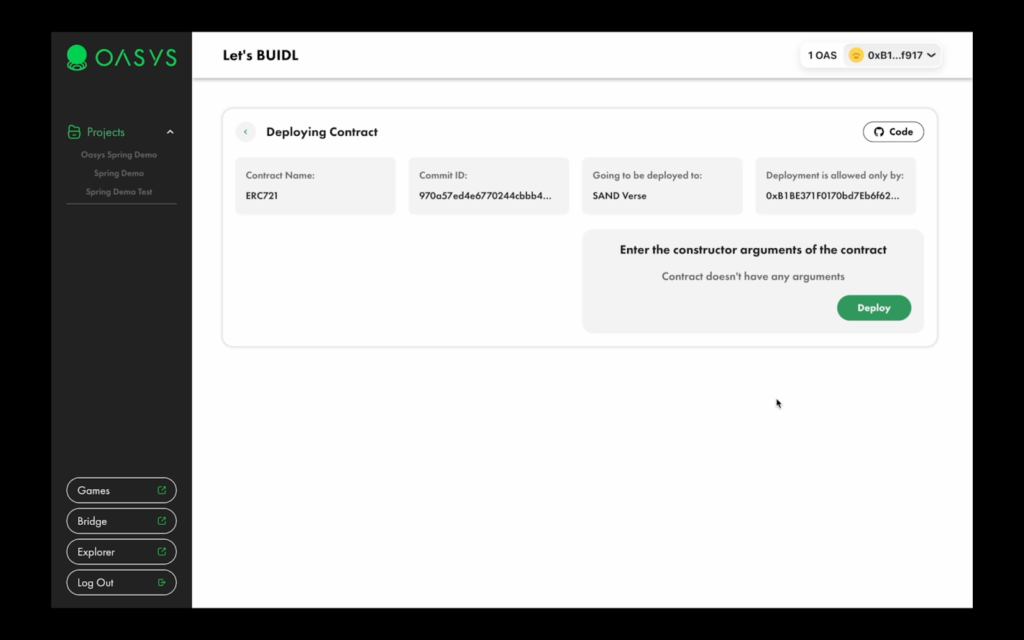
You will see all the details of the contract before deployment.
- Before deployment, you need to acquire some faucet tokens (It’s FREE)
2. Click on “Deploy” to start deploying.
3. It will open your wallet, where you need to sign the transaction and wait.
- ❗️Please don’t close the window until the transaction is finished!
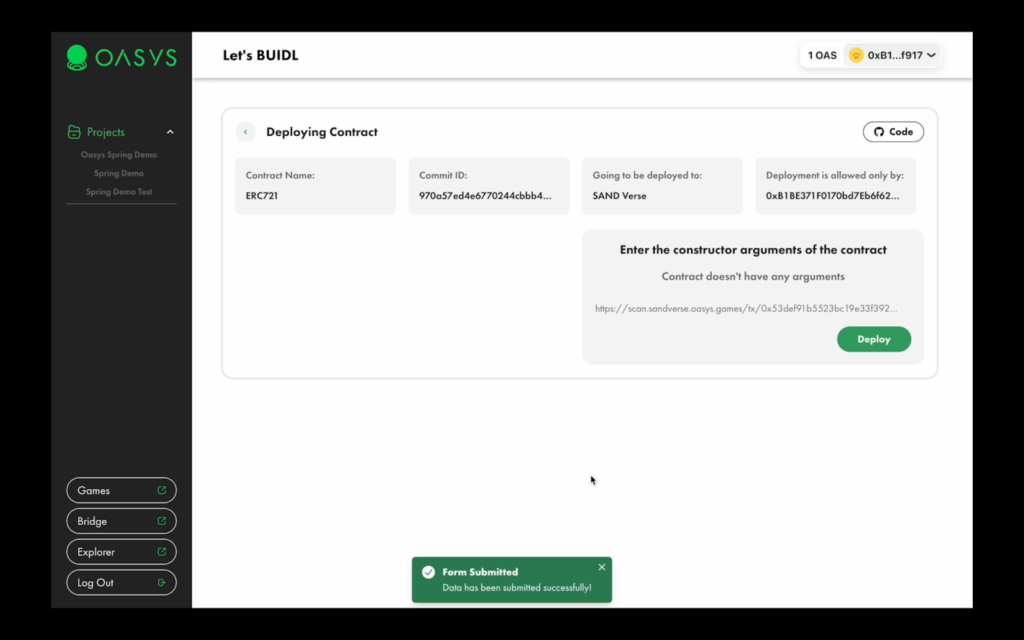
Once deployment is completed, you will see a link to the block explorer, where you can find all transaction details.

Click on the back button to return to the dashboard.
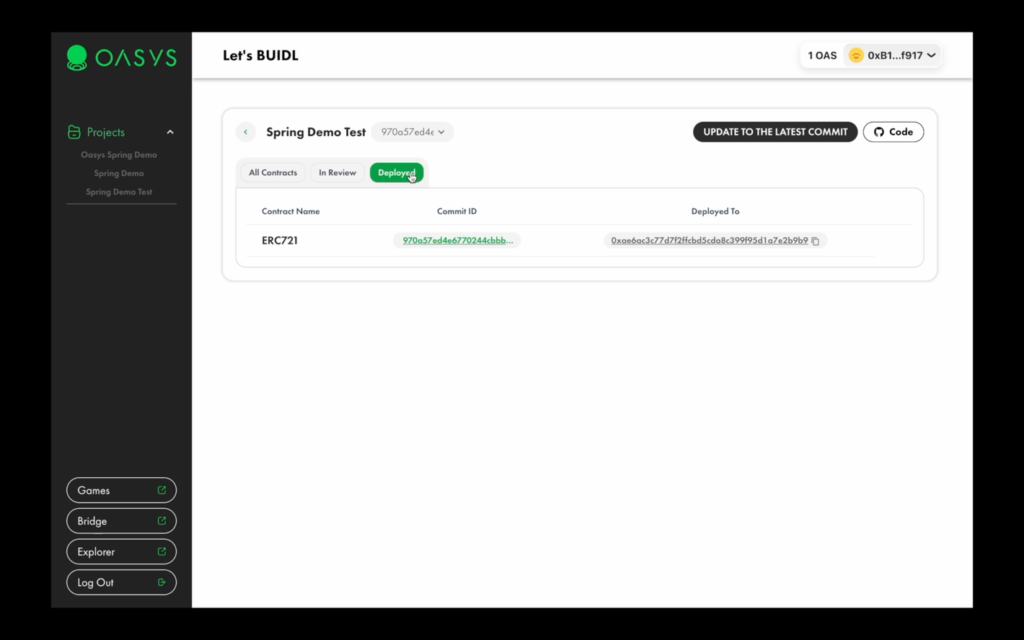
Click on the Deployed tab to see your deployments.
Congratulations, you have successfully deployed your project using the Oasys Spring tool!
Next Steps
Now that you have finished deploying your smart contracts to Oasys, you can continue experimenting with your project with additional functionalities in the smart contract and improved UI.
Be sure to explore other available integrations for an even better user experience for your dApp or game.