This article aims to teach readers how to create an Ethereum DApp (Decentralized Application) using Truffle and Web3.js. Readers who are new to some of the terminologies and technologies used in DApp programming do not have to worry as this article provides a detailed explanation of all the terminologies that are used in the creation of this Ethereum DApp. We will also show you the setup required to monitor API transactions that are sent to the blockchain network.
Introduction
Before we start coding and creating our DApp, there are some very important terminologies and technologies you need to understand. This section will explain each of them in a way that’s friendly to both beginners and more advanced developers.
What are DApps
Unlike traditional applications that rely on a centralized backend server to send and receive resources, DApps runs its backend on a decentralized network. DApps do not have a central decision-making node or server but are instead connected to a blockchain that consists of a large cluster of nodes connected.
What is blockchain
When creating the backend for a traditional web application, you will need a server to send and receive resources and a database to store information. Blockchain is a server and database all-in-one. A blockchain consists of nodes (computers) that are interconnected, thereby forming a peer-to-peer network. All resources and data in the blockchain network are shared with every node. This means your computer and every other computer have a copy of all the information shared on the blockchain network. The transaction data in a blockchain is contained in blocks all of which are chained together to form what is called a public ledger. Cryptographic hashing is used to secure the data stored in the public ledger, while a consensus algorithm is used for validation.
What is Ethereum?
Ethereum is a blockchain technology that was made specifically for creating decentralized apps. Unlike the popular cryptocurrency Bitcoin which stores numbers, Ethereum on the other hand, stores executable codes in the form of smart contracts.
What are Smart Contracts?
Smart contracts consist of executable codes defined by the developer for specific purposes. They allow us to read and write data to and from the blockchain. Solidity which is quite similar to JavaScript is the programming language that is used to create smart contracts.
What is JSON-RPC
JSON-RPC is a stateless, lightweight remote procedure call (RPC) protocol. It allows frontend applications to communicate with the Ethereum blockchain.
Truffle and Web3.js
Web3.js is a collection of JavaScript libraries that allow users to communicate with a remote or local Ethereum blockchain network using HTTP, IPC, or WebSocket. While truffle is a framework built based on the Ethereum Blockchain that helps developers to easily and effortlessly build DApps. It serves as a development environment, testing framework, and asset pipeline all-in-one. In essence, with the truffle framework, developers can compile and deploy Smart Contracts and also use it to build a standard front-end interface for DApps.
Building the application
Now that we have an understanding of the concepts and technologies that are required in building a decentralized application, it’s time to dive into developing the application. You must have Node and the package manager (NPM) that comes with it installed on your system. After that, all you need to do is to follow these steps:
Note: We will use windows in this article, but the process is similar on Mac.
Step 1: Install the Truffle Framework
npm i -g truffle
This will install truffle globally, so you can use it in other projects. It’s best to have the latest version of node installed so you don’t have any issues during installation. To confirm truffle installed run this command:
truffle

Step 2: Generate Truffle’s boilerplate
truffle unbox react
Truffle has different boilerplates which is referred to as boxes, one of which is a boilerplate for React, the popular library made by Facebook. Running this code generates folders and files required to use smart contracts from a react application.
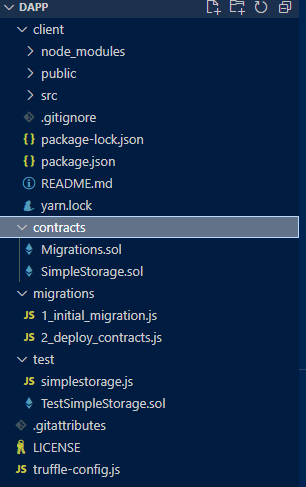
The folders generated include:
- client: contains the react app.
- contracts: contains smart contracts that were written in solidity.
- migrations: contains scripts to manage the deployment of contracts into the Ethereum network.
- test: contains tests written in Solidity or JavaScript.
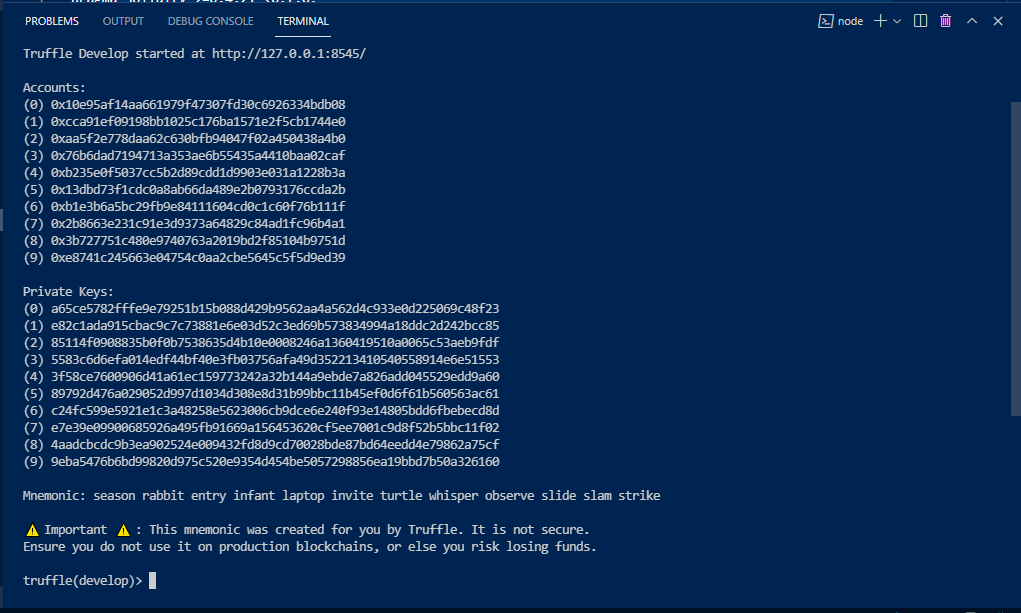
Step 3: Start a truffle development blockchain
truffle develop
This code starts a development blockchain on port 8545 and the truffle command line prompt.
Step 4: Compile and migrate the smart contracts
compile
migrate
This compiles solidity contracts into JSON artifacts and then deploys them to an emulated Ethereum network.
Step 5: Run the DApp
Open a new terminal, move to the client folder, and then start the application. The application loads on React’s default port (port 3000).
cd client
npm start

Step 6: Set up Ethereum Web3 API monitoring
Unlike traditional servers where you can install monitoring tools to know the status of the server and its resources, DApp requires a different type of monitoring solution to monitor interactions with the smart contract and Ethereum network. We will use Moesif to capture the API calls gotten from the Ethereum blockchain and use it as a means to monitor the blockchain. Go to Moesif, create an account in order to get an application id.
Step 7: Add Moesif to your frontend
Copy-paste the code snippet into the index.html in the public folder
<script src=”//unpkg.com/moesif-browser-js@1.2.0/moesif.min.js”></script>
<script type=”text/javascript”>
var options = {
applicationId: ‘Your Moesif application id’
// add other option here.
};
// for options see below.
moesif.init(options);
// this starts the capturing of the data.
moesif.start();
</script>
Open postman to view and monitor the API calls.
Finally, If you find all this too hard for your current coding knowledge, you can try creating your own Dapps with no code very easily and quickly with BUNZZ graphic user interface.
You can learn more about Bunzz here: app.bunzz.dev