In this guide, you will learn about creating your own token in 5 mins using Bunzz and launching on the Polygon network, and it will be a step-by-step process.
Before we start, we need to understand a few things, and I promise it won’t be a long, boring history class lecture!
What is Polygon Network?
Polygon Network is a Layer-2 chain of Ethereum, built to improve speed, reduce fees and increase productivity.
Why Polygon?
Building on Polygon can reduce the transaction fees by more than 99% thus you can deploy your token at a cost way lower than Ethereum.
Polygon is very fast too, so your users can use your token faster and cheaper!
Now let’s get our things ready to launch a token; who knows, maybe your token will be the next Shiba Inu (SHIB).…
Prerequisites to create a token on Polygon Network With Bunzz
- Bunzz console— to create and deploy our token and smart contract without writing solidity code
- MetaMask — to interact with the Polygon Network
- Quick Node — to interact with Polygon Testnet (also called Polygon Mumbai)
- Some MATIC tokens — we can get them from the faucet
Let’s get started.
Set up QuickNode with Polygon Testnet nodes
What is QuickNode? QuickNode is a platform that helps you access the blockchain environment without the hassle of hosting your own node, saving time and resources.
It lets you access blockchain nodes in a few clicks and you can scale the node performance according to your need thus creating an environment for you to scale your DApp.
- Sign in / Sign up for your QuickNode account
- Click on create a QuickNode endpoint
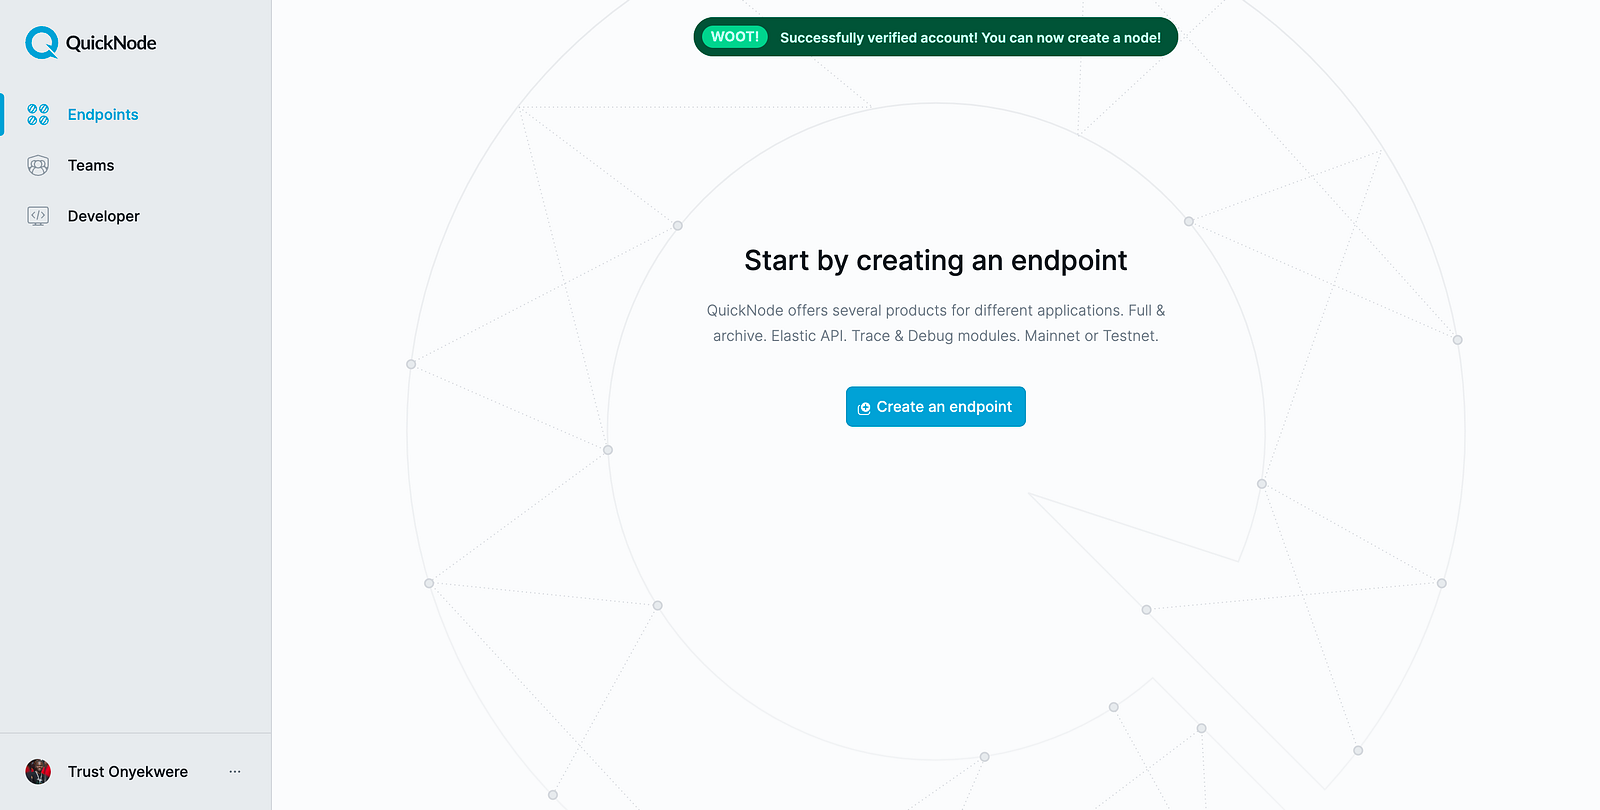
- Now select Polygon as Network and Mumbai Testnet as chain and continue
- We don’t need any add-ons so click Create Endpoint now
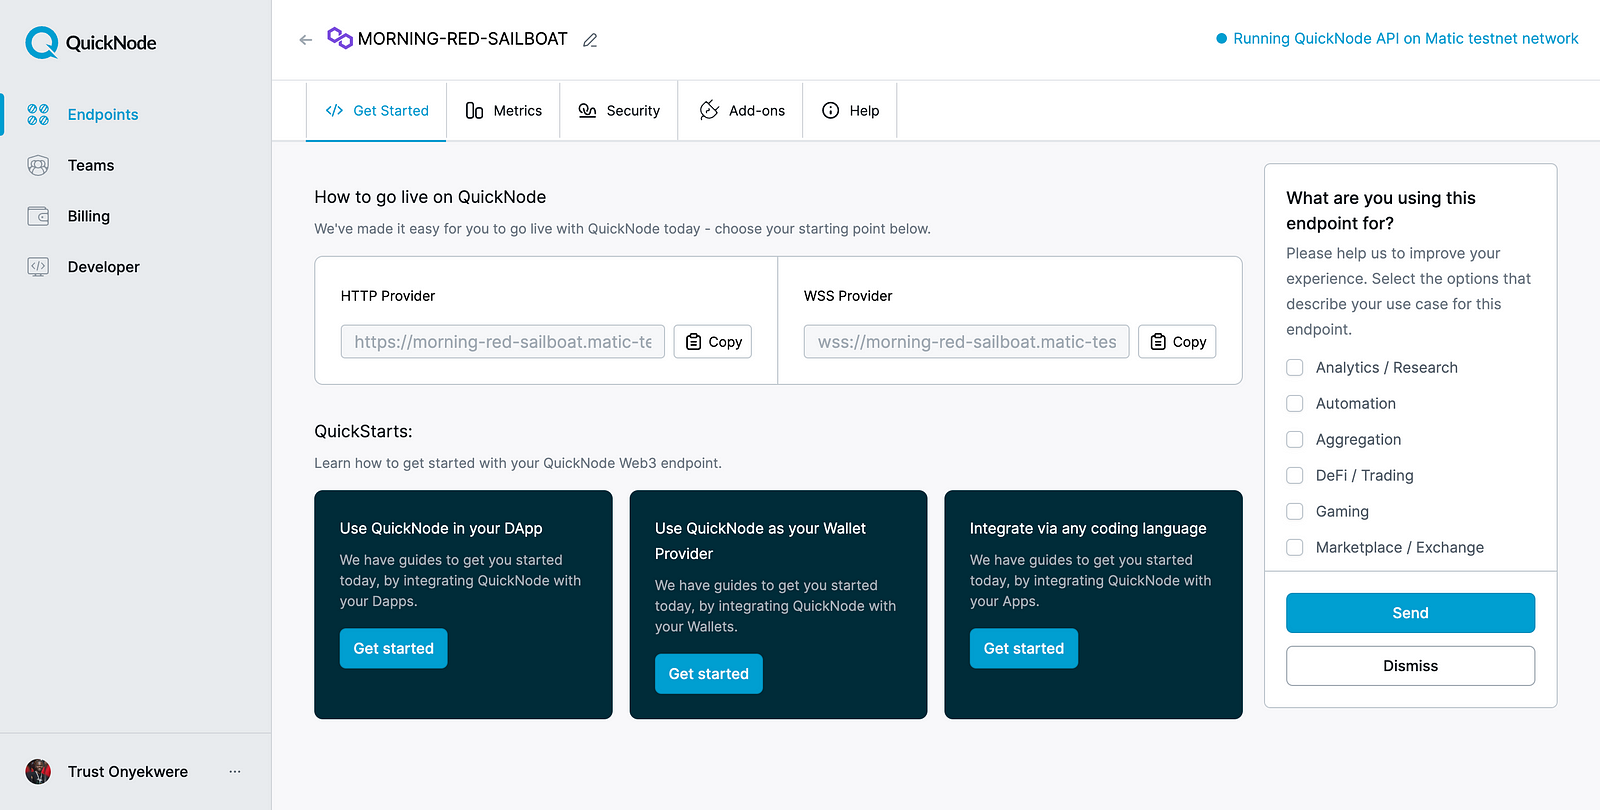
Once you create the endpoint you can start setting up our MetaMask Wallet with QuickNode.
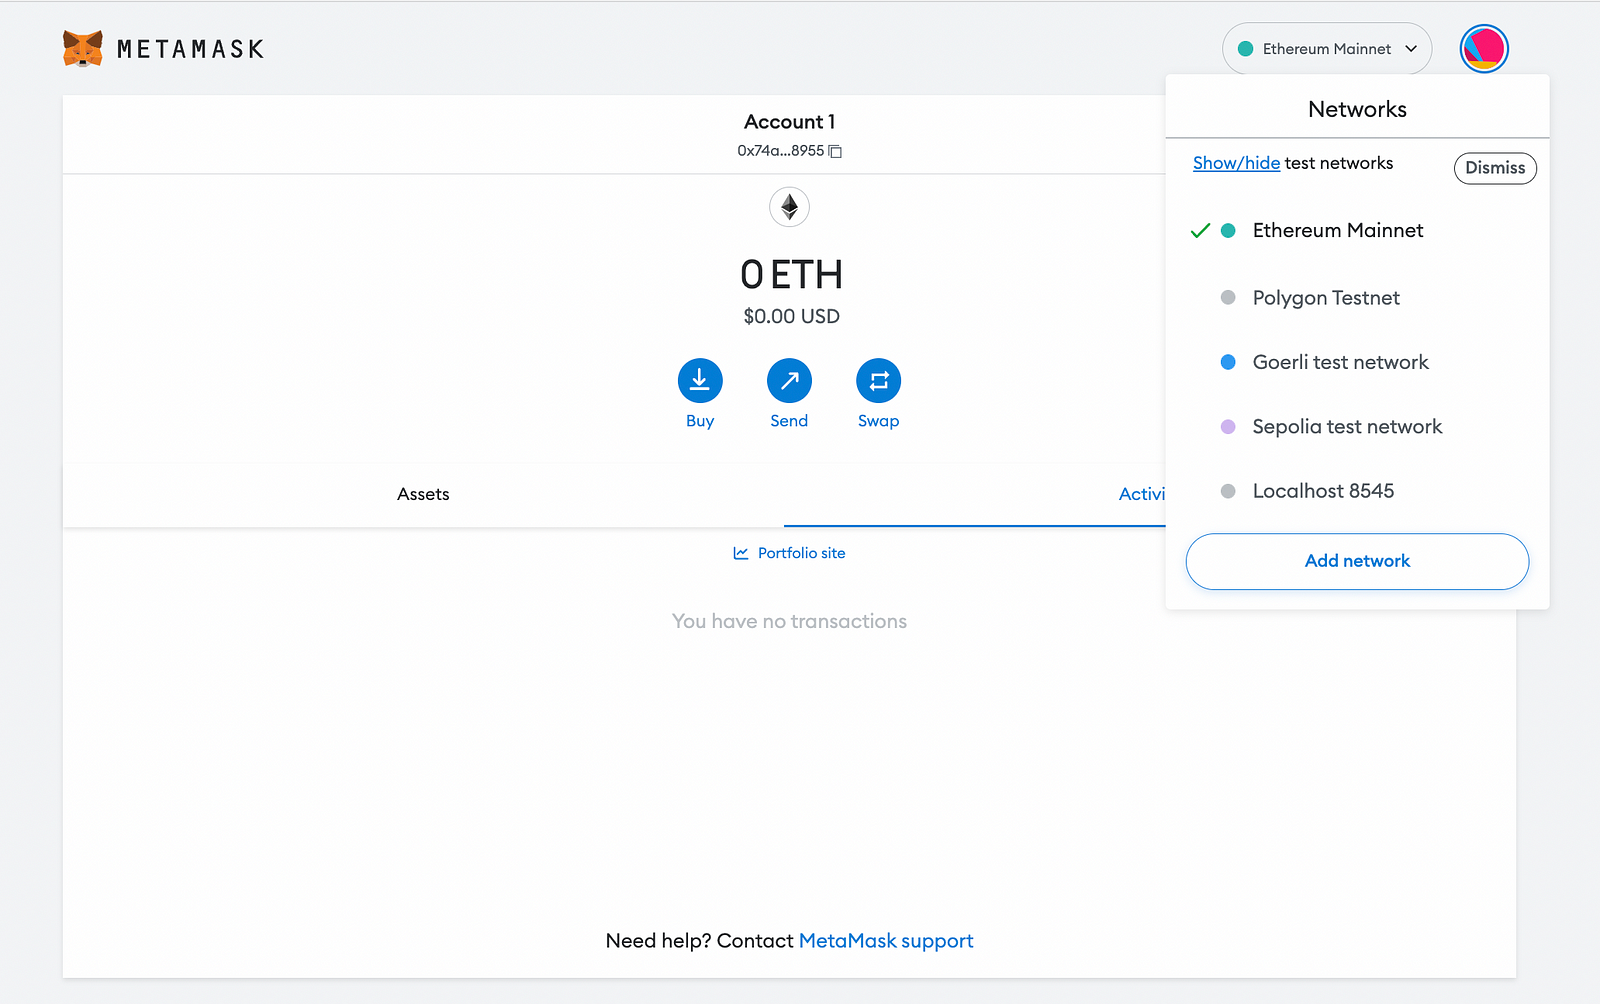
- Go to your MetaMask wallet and click on the list of networks
- A drop-down list will show up with a list of networks but you need to click on Add network at the bottom of the list
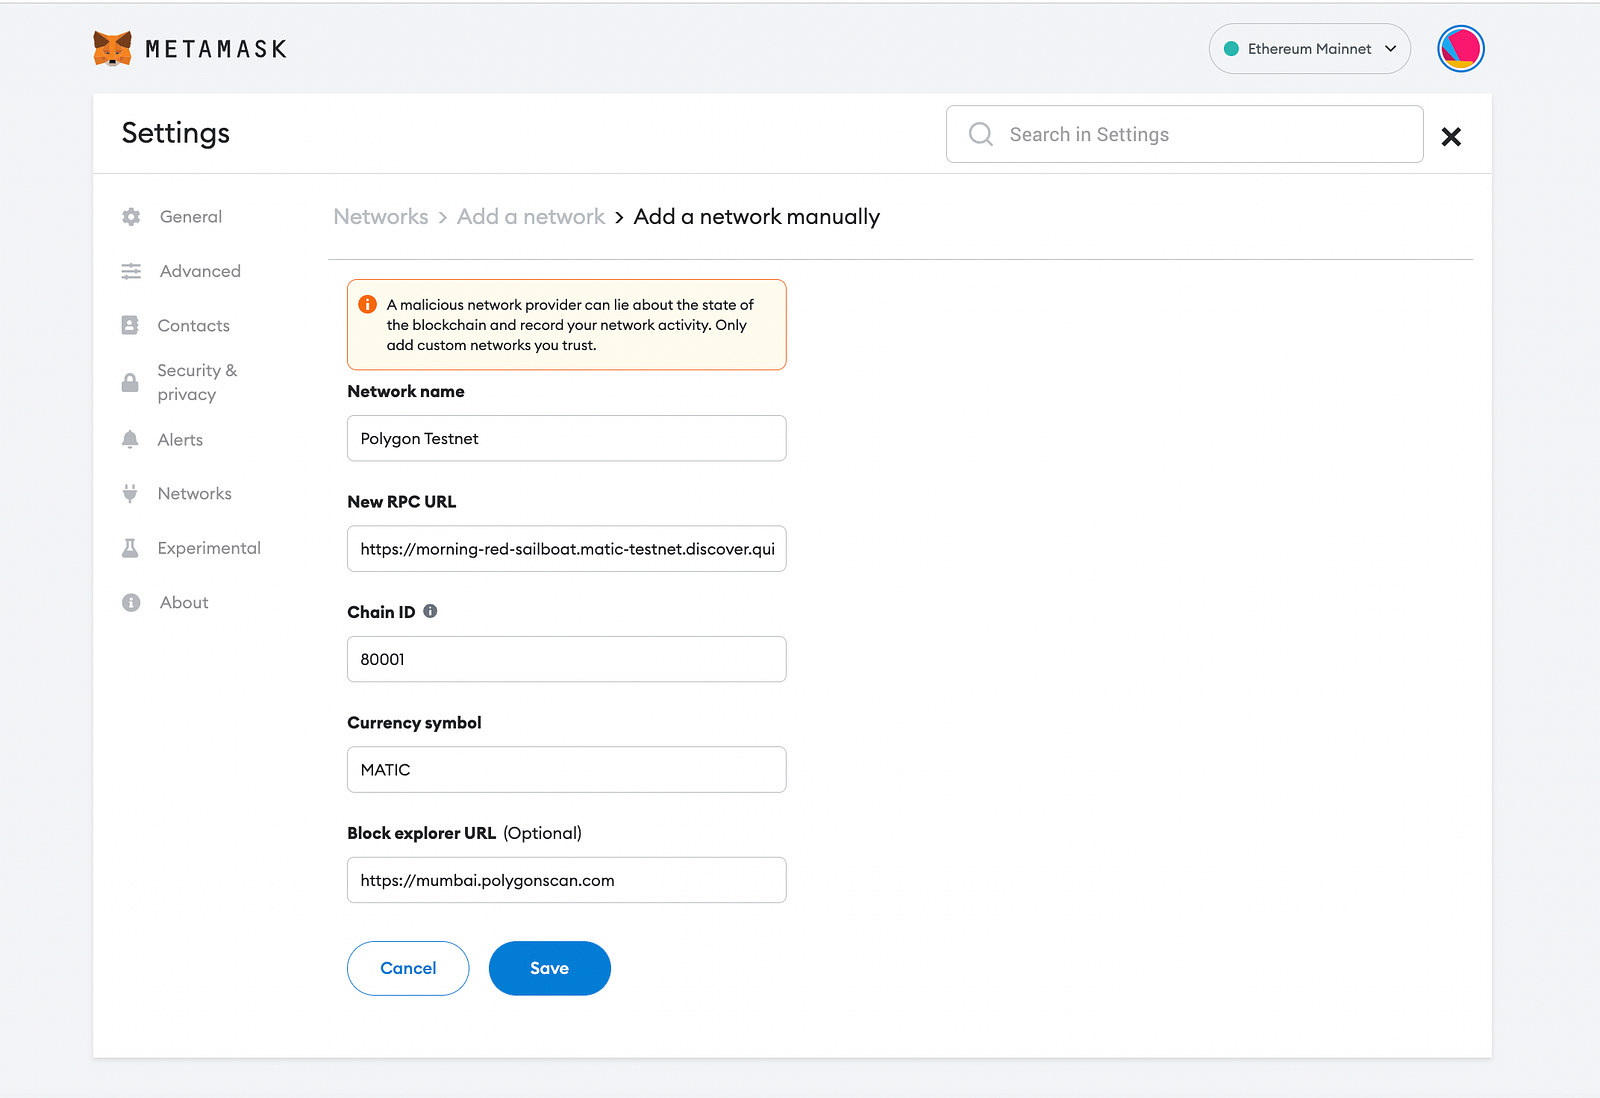
- Now you will have a form to fill up to add a new network to your MetaMask account
- Go back to QuickNode Endpoint Dashboard, and copy the HTTPS Provider link.
Now let’s go back to the MetaMask add network form and paste the:
- HTTPS in New RPC URL field with 80001 as Chain ID
- “MATIC” as a Currency Symbol
- Polygon Testnet as Network Name (any name you like) and,
- Finally, https://mumbai.polygonscan.com/ is Block Explorer URL
- Done? Click Save
So, we have finished setting up MetaMask for our token and by now you will have created your Polygon Metamask Address. Let’s go get a free MATIC token to pay for the transaction fees.
Let’s get us some free MATIC
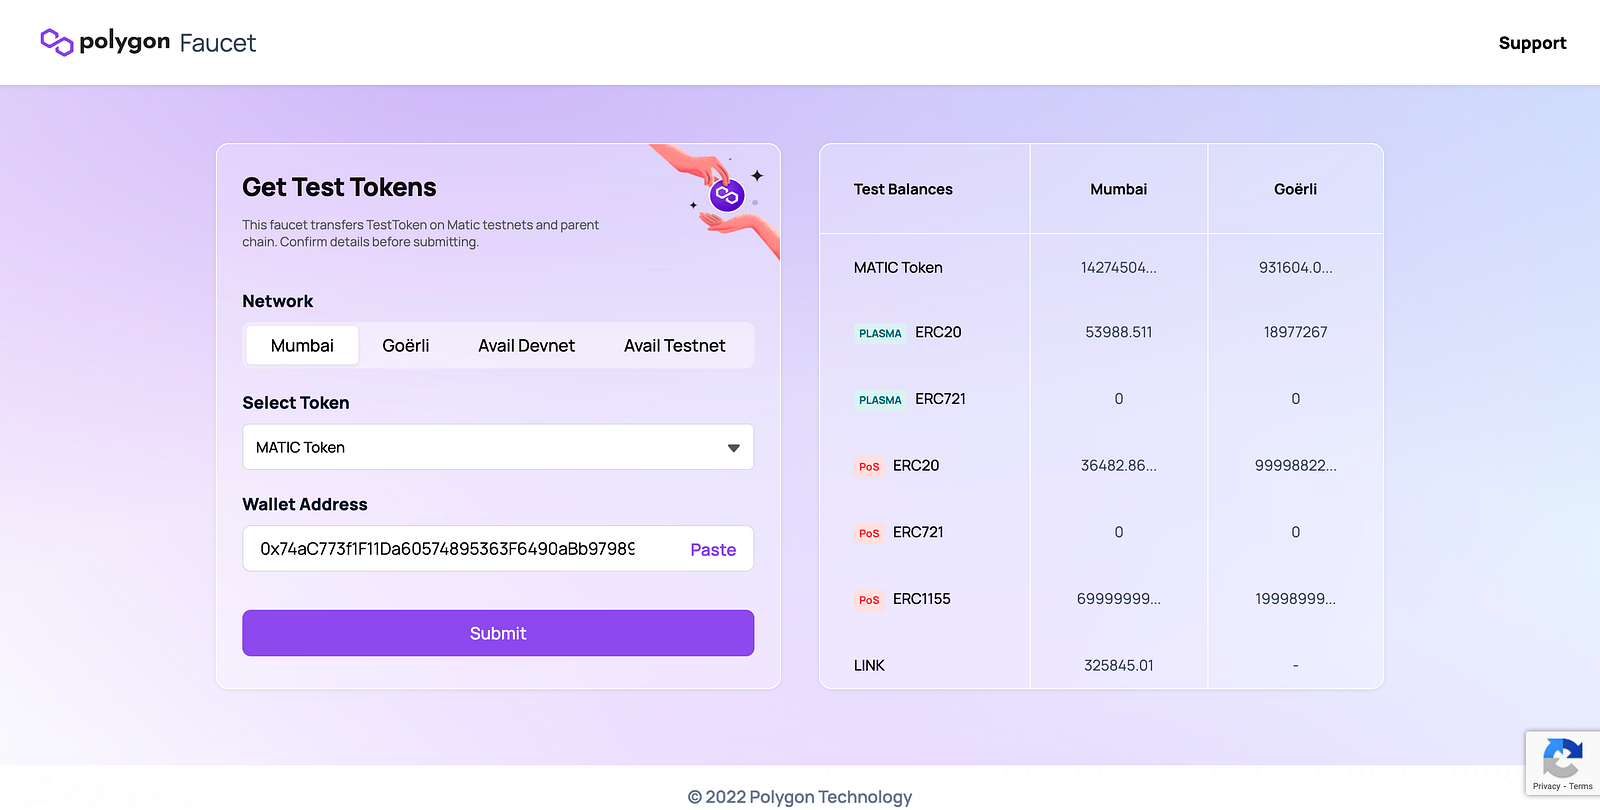
Since we are on Testnet, we can go to the faucet and get free MATIC.
- Go to https://faucet.polygon.technology/
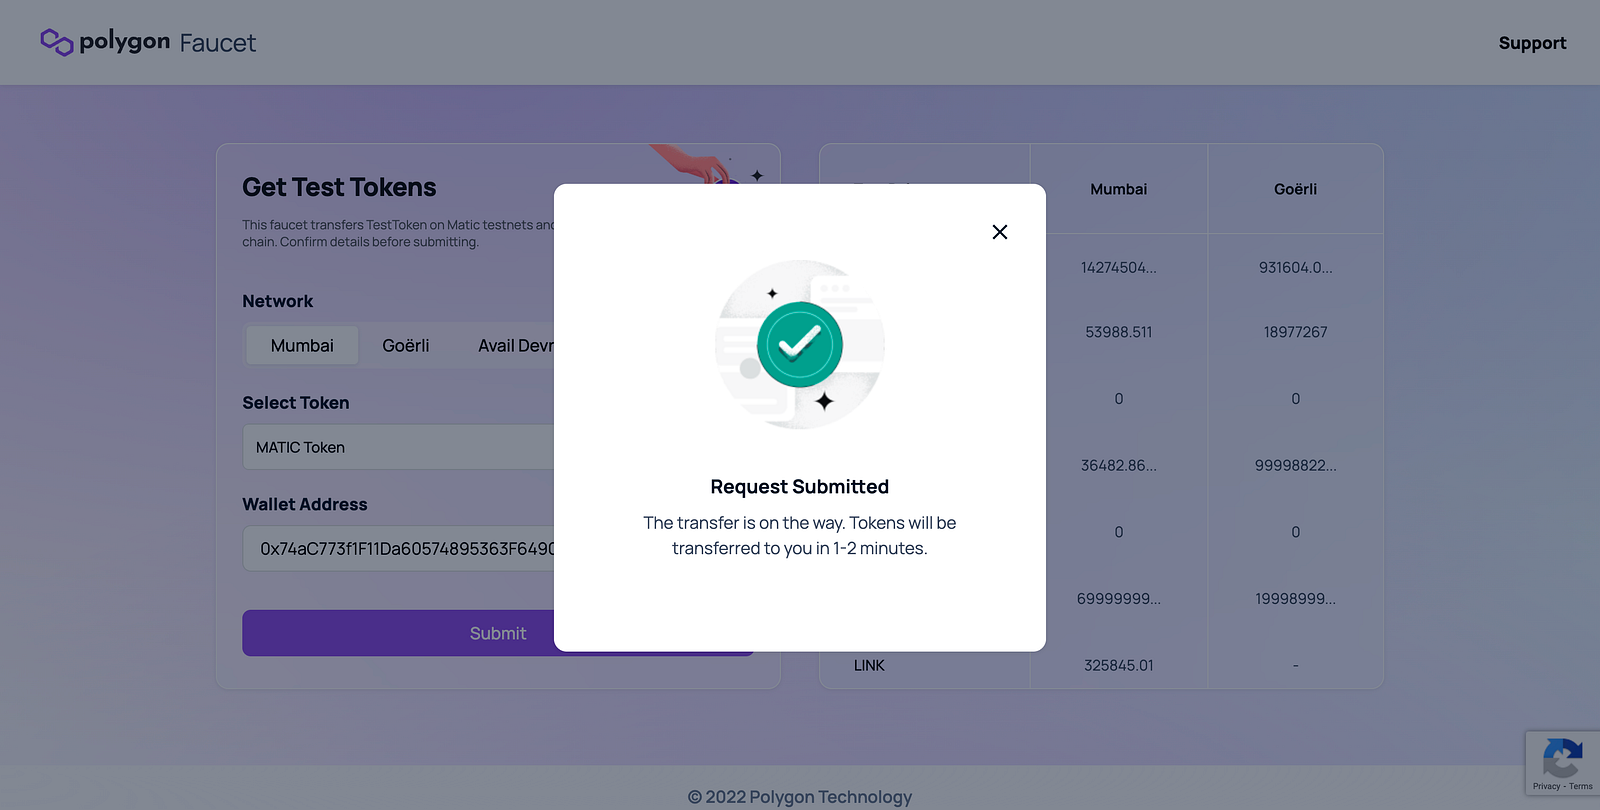
- Select Mumbai as Network, MATIC as the token, and then paste your MetaMask Polygon Address. Click Submit and confirm the transaction
Now you will have some MATIC tokens in your account to pay for the transaction fees.
We have just finished setting up everything we need for the deployment.
Next, you will create your own ERC-20 token contract in just 5 minutes without writing solidity code! No joke.
Deployment and token launch on Polygon Testnet
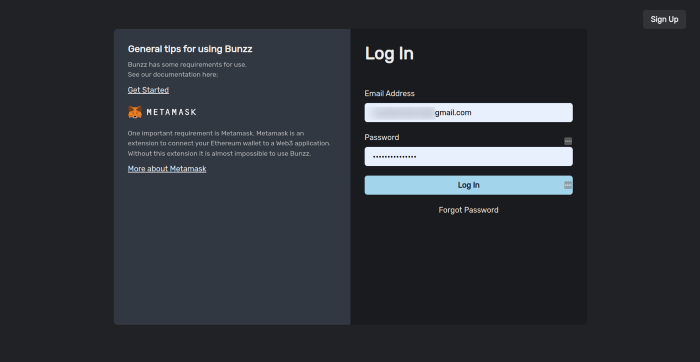
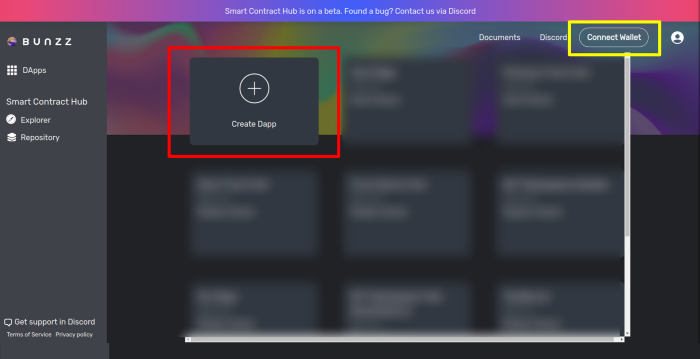
Go to Bunzz and log in or sign up if you’re new to the platform.
Once you are logged in, you will have access to the Bunzz dashboard where all the magic happens.
- Connect your Metamask wallet and then
- Click on “Create DApp”
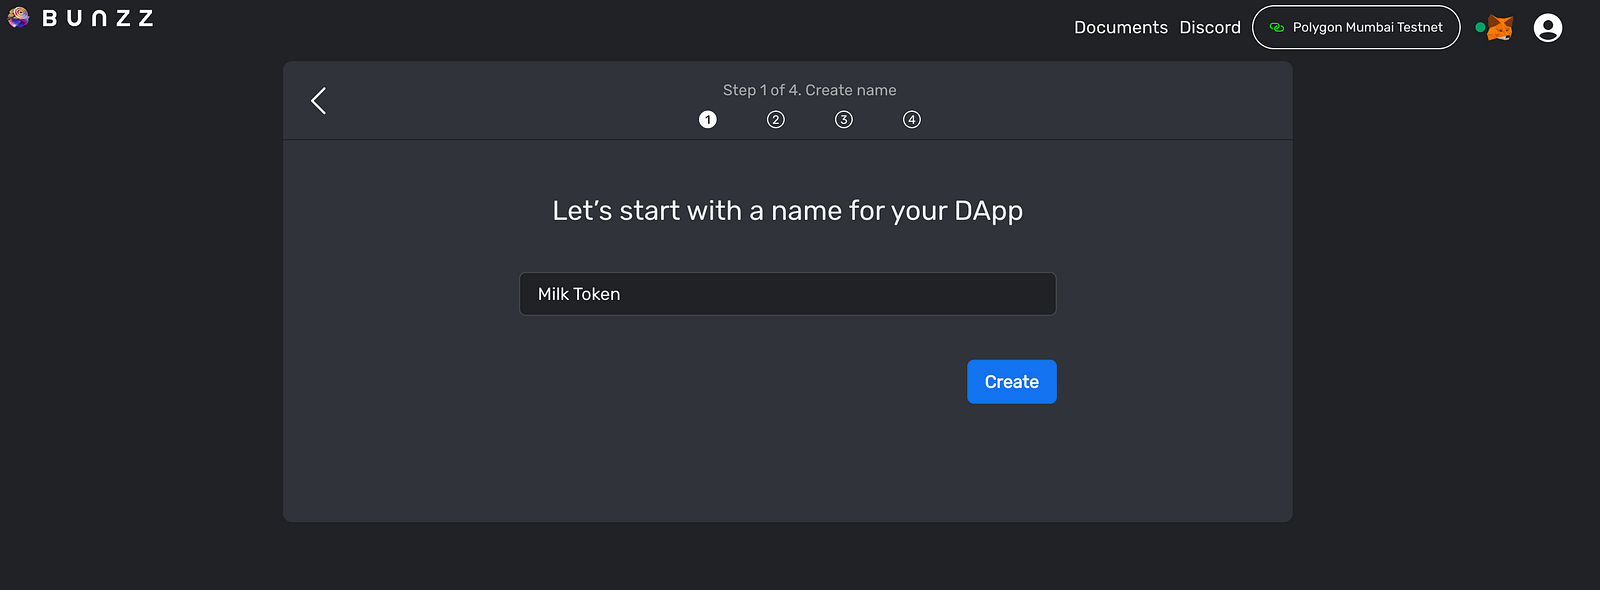
- Give your DApp a name.
You can use any name. I used Milk Token for mine.
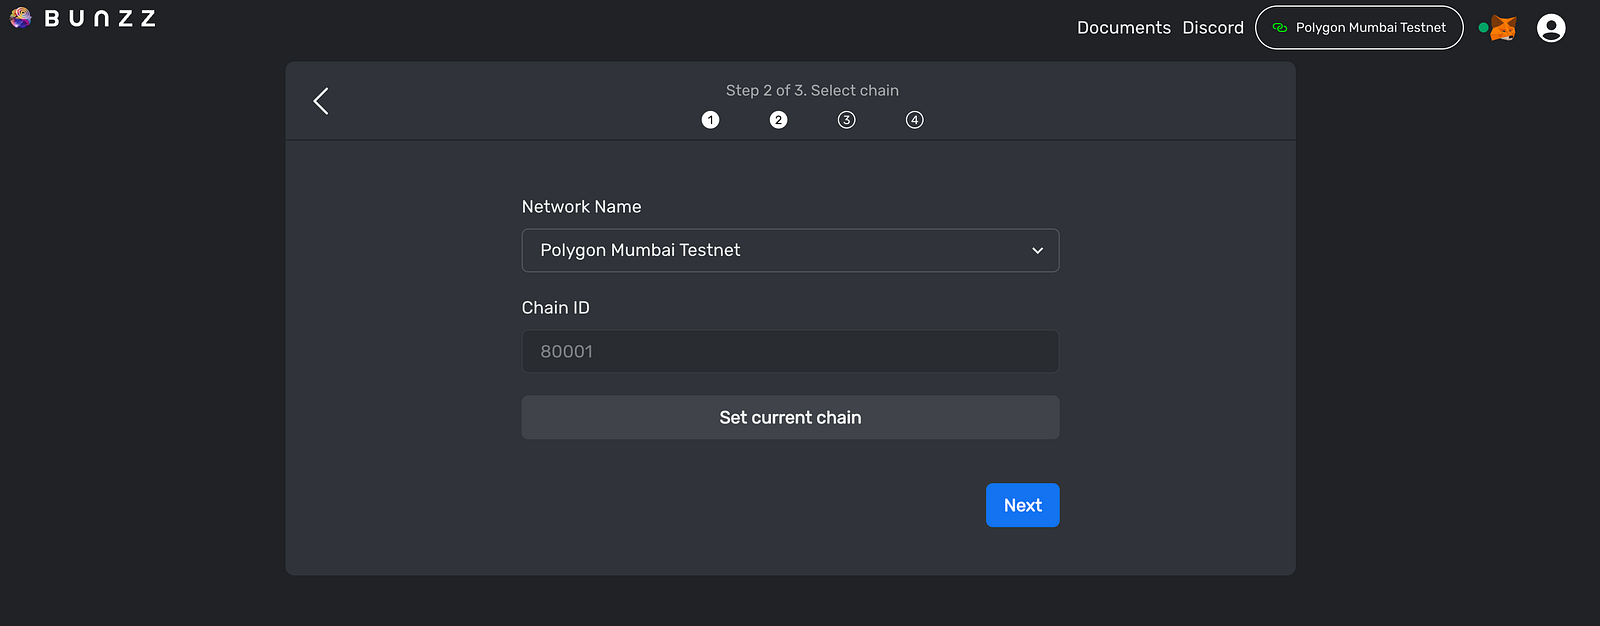
Next, Select a blockchain network for the DApp. Scroll through the options in the dropdown menu and select Polygon Mumbai Testnet.
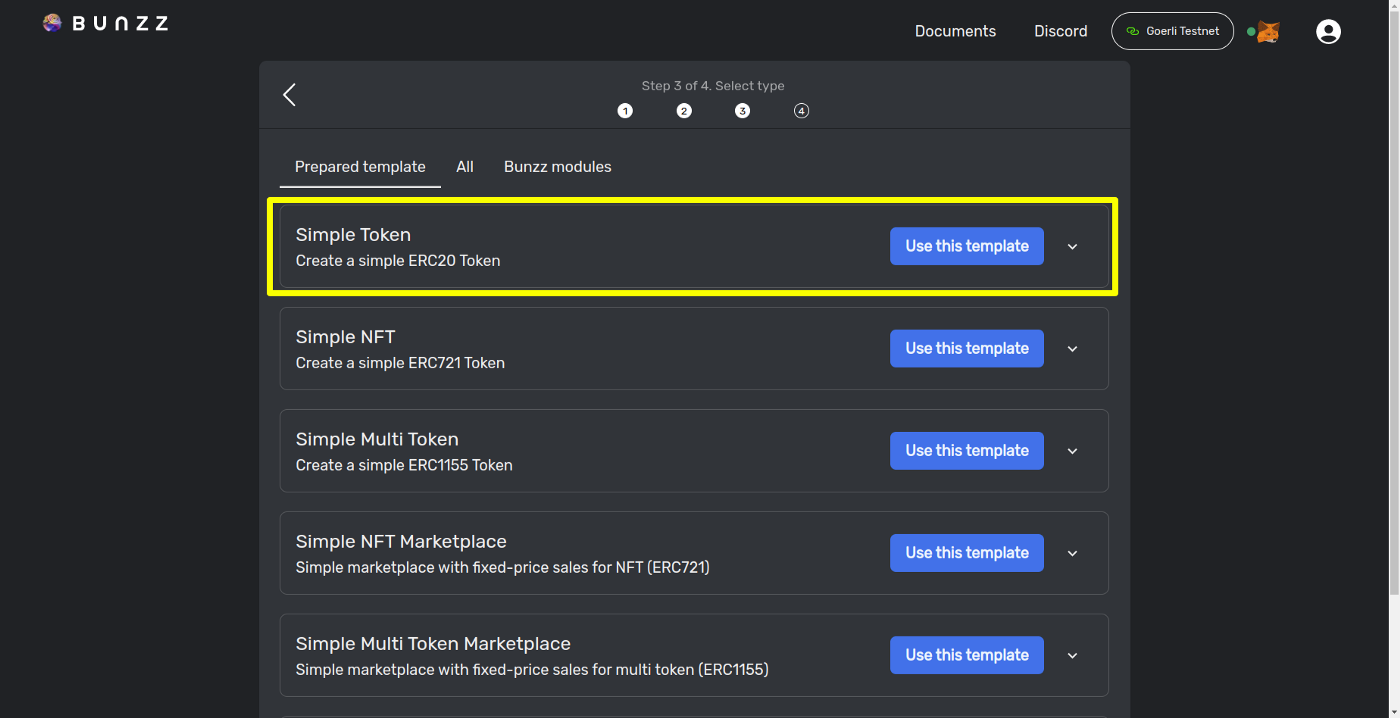
Up next is to select a template from the many available already made smart contract templates.
- Select the simple ERC20 Token.
- Customize the token by adding a name and a symbol.
I have named mine Milk Token and MTK as the symbol.
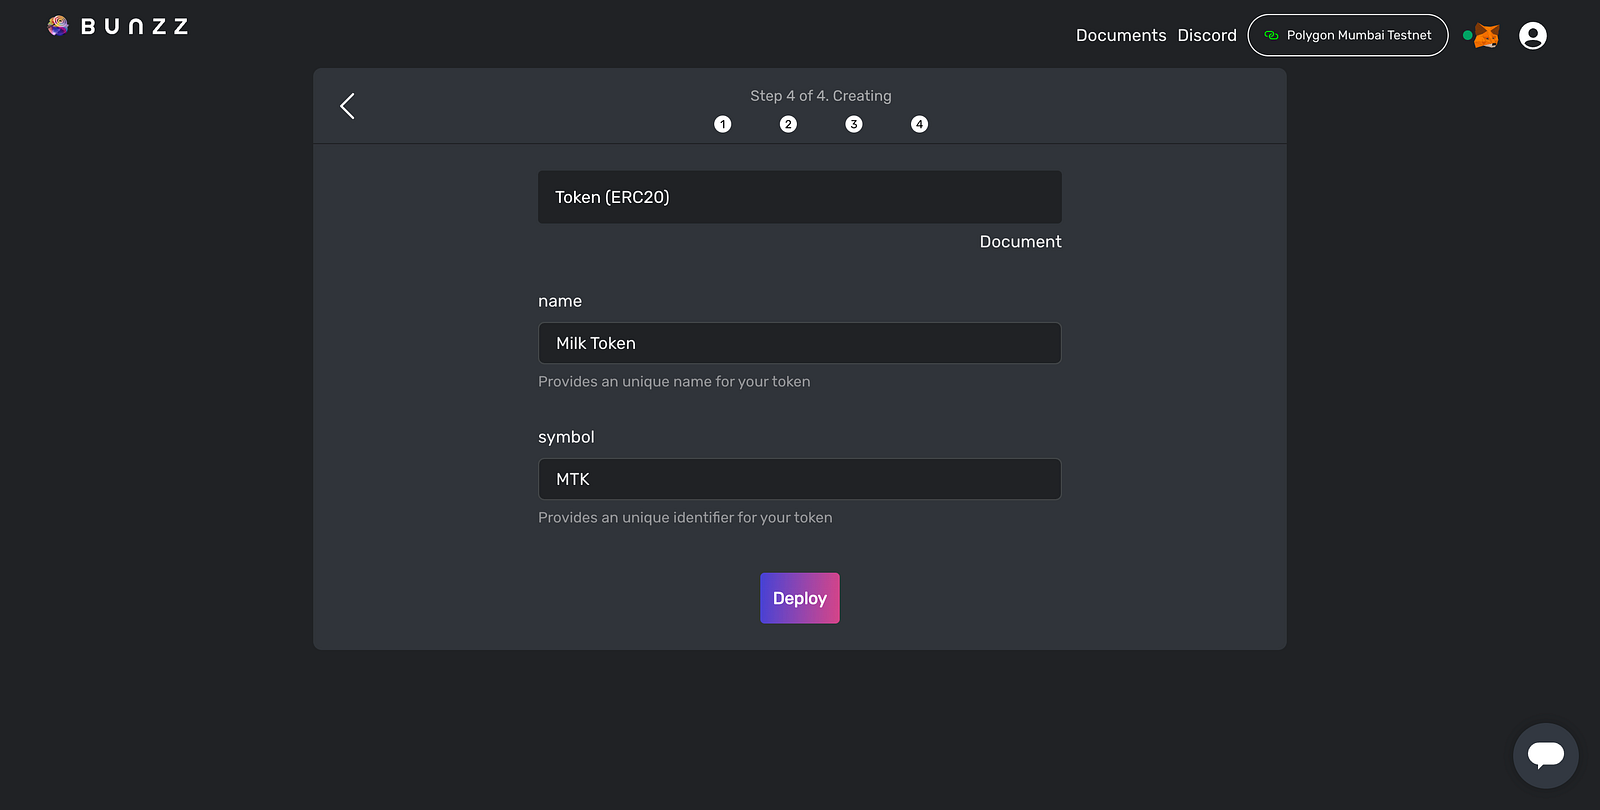
Once you are done customizing,
- Click on deploy and wait for it to sync by approving three transactions that would pop up via Metamask.
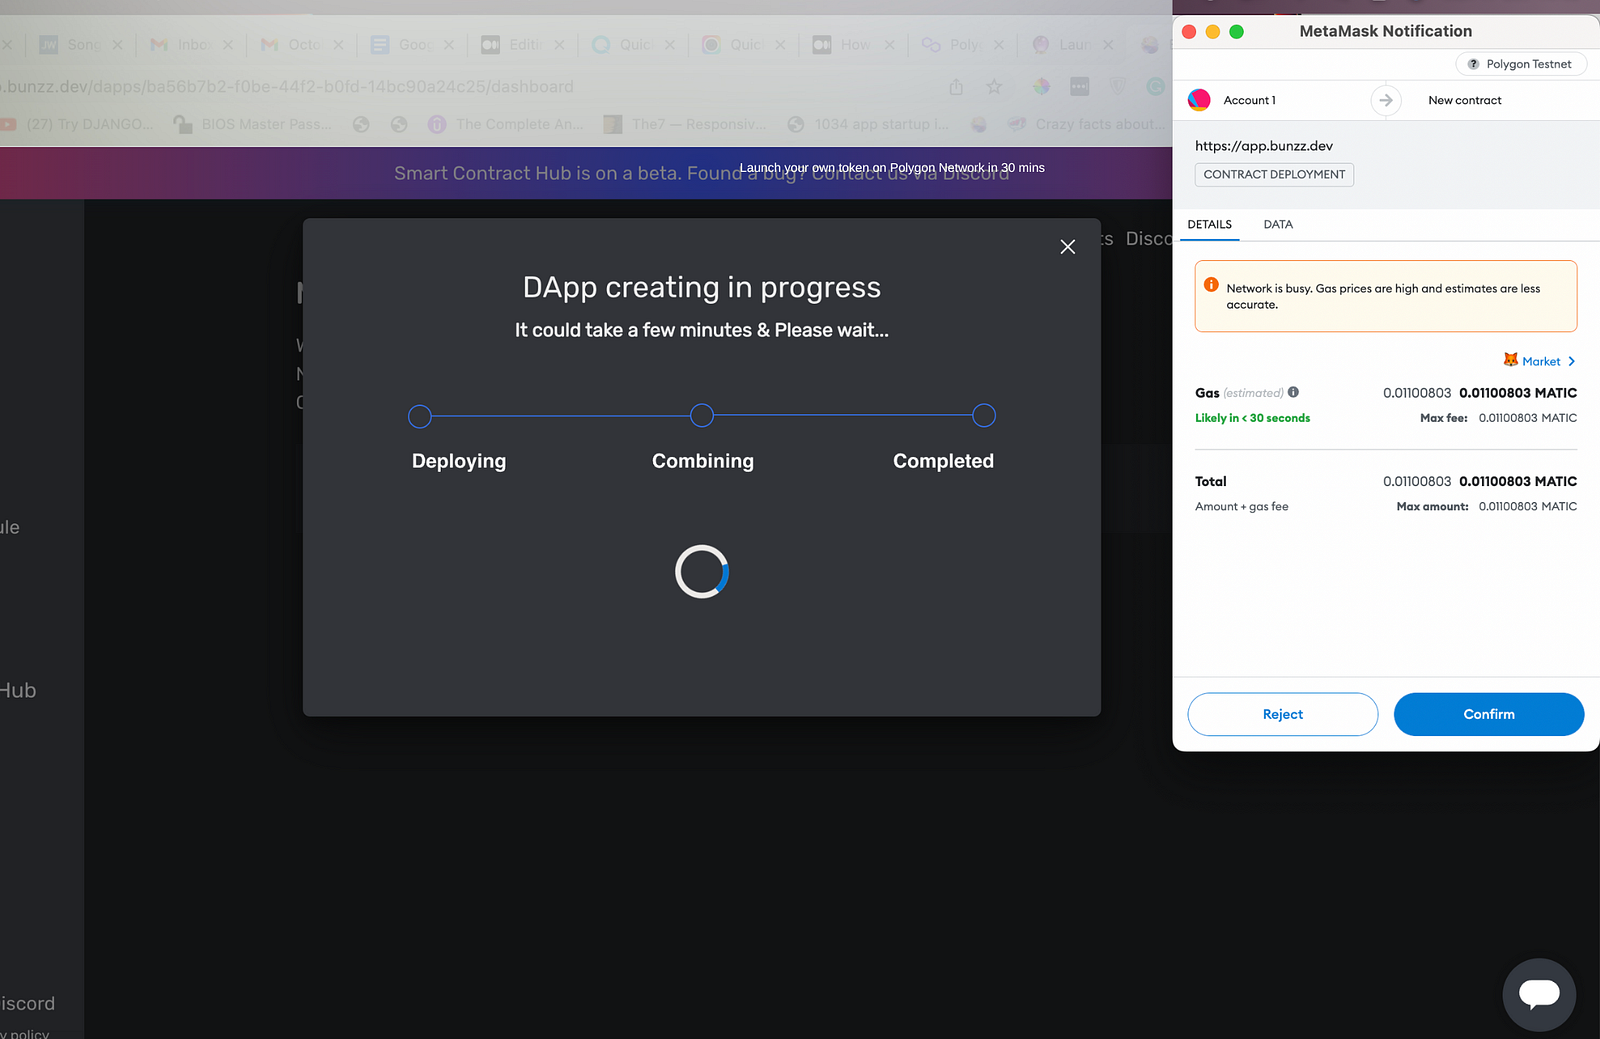
Hurray!
You’ve done it. You have successfully deployed an ERC20 smart contract for our new token.
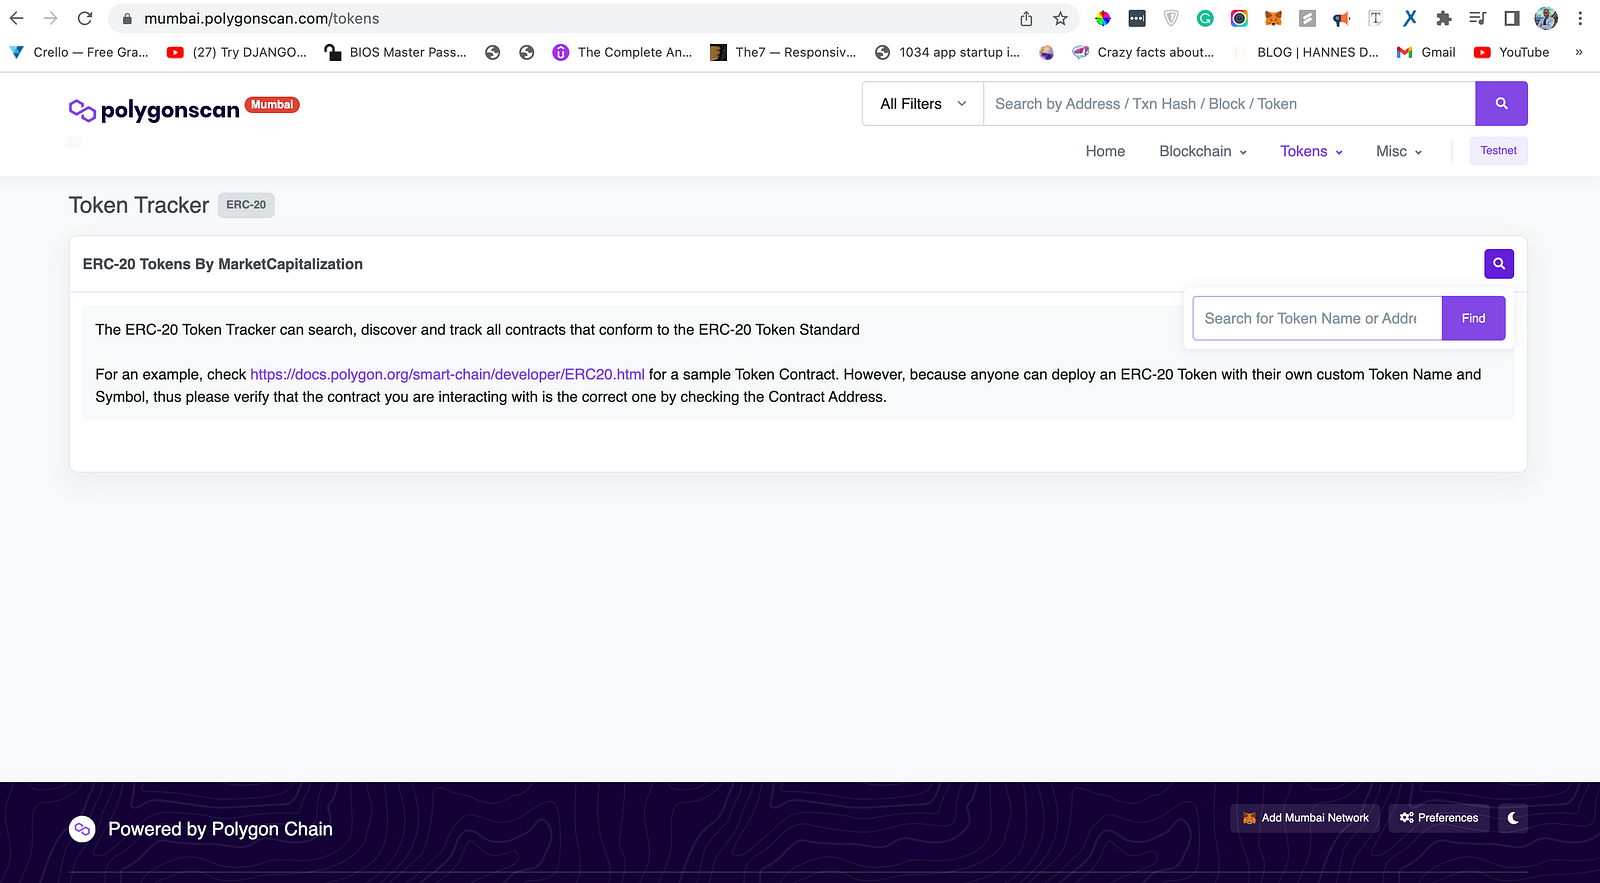
Now, proceed to check Polygon Token Tracker and confirm if the new token is really on the Polygon chain.
- Copy the token address using the copy icon on the dashboard.
- Paste the token address on Polygonscan and click on the Find button.
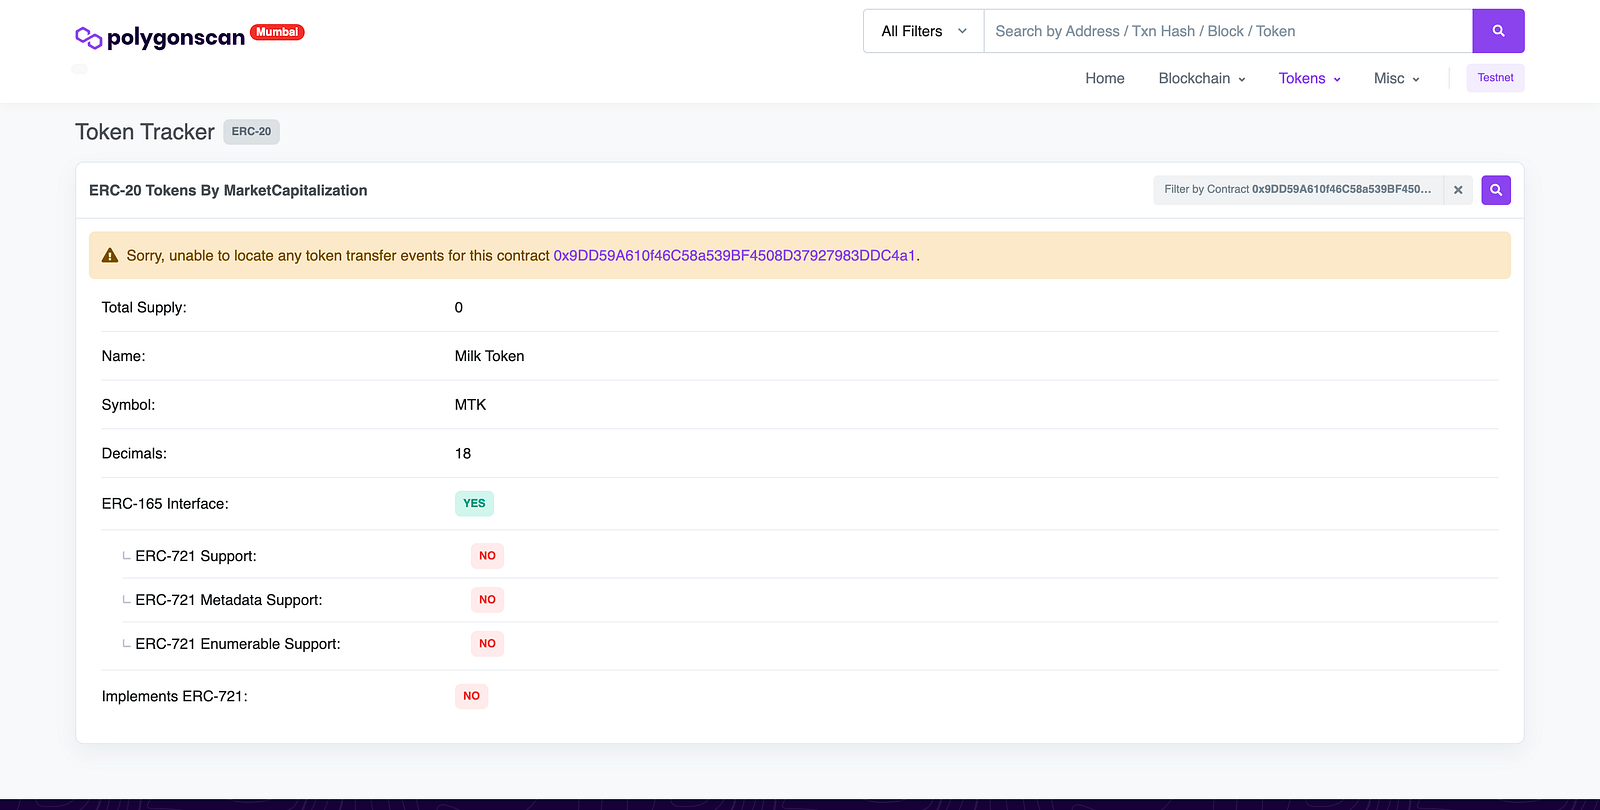
Great!
You can see the token name and symbol we created on the Polygon chain.
Congrats your token has been created!
Conclusion
If you decide to make a token for real use, make sure to use this guide only as a starting point. It’s a deep topic that takes a long time to understand fully.
Beyond creating the token, you also need to think about making it a success post-launch and studying other projects and their launches to see what worked well and what didn’t can help with creating your own token.
Want to Connect?If you follow these steps and got stuck, or if you have any questions, feel free to reach out on Discord or send a DM on Twitter.